Verify your Parent Account and add a Student
The My Account page allows you to review, change, and verify your account settings and add students to your ASCENDER ParentPortal account.
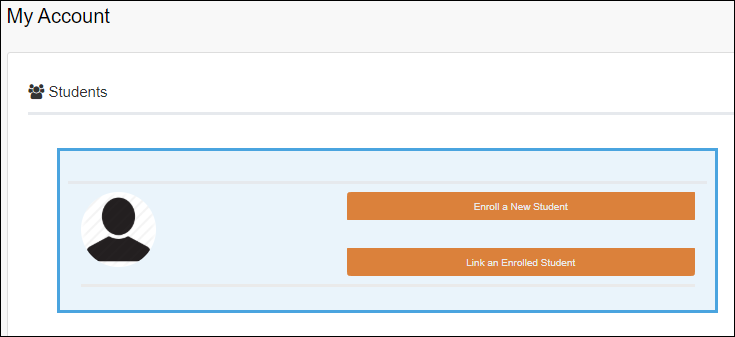
Student Menu
Enroll a new student in the district
❏ Click Enroll a New Student.
The New Student Enrollment page opens.
❏ Follow the steps of the enrollment process.
Link a student to your account
❏ Click Link an Enrolled Student.
A pop-up window opens allowing you to add a student to your ParentPortal account.
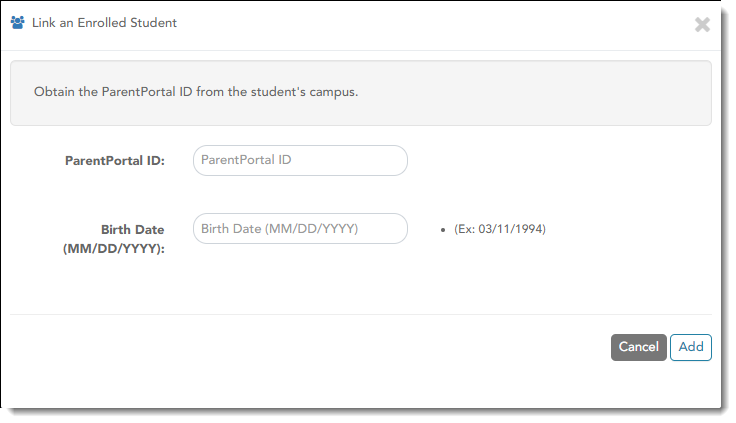
Student Portal ID
Type the ParentPortal ID provided by the student's campus. If you do not have this ID, you must contact the campus to get the ID. You cannot add a student without entering a valid ParentPortal ID.
The ID is case sensitive and must be entered exactly as it appears (example: qbQgk3qAs2z).
Birth Date
Type the student's complete birth date. The date entered here must match the birth date in the student's record at the campus. You cannot continue without entering the correct birth date.
❏ Click Add.
If your student was successfully added to your account, the student's name will appear on the page. You will now be able to access your student's data.
Maintain a student's data
❏ Click View/Edit.
The Student Data Editing page opens allowing you to add a student to your ParentPortal account.
❏ Follow the steps of the student data editing process.
View info about a student's associated users
❏ Click Users.
The card expands to display the parent user accounts associated with the student, including the
Delete a student from your account
You can delete a student from your account; however, you will need to have a valid ParentPortal ID issued by the campus if you wish to re-add the student at a later time.
Contact Information
Update and verify email address and mobile phone information.

Email
You must provide and verify your email address before you can access features that require your email address. You can update your email address at any time.
Current Email Address
This field is displayed if your email address has previously been entered.
• The message “Verified” is displayed if the email address has been verified.
• The message “Unverified” is displayed if the email address has not been verified.
If no email address has been entered, type your current email address.
Your email address must be entered in a valid format (e.g., name@domain.com).
You cannot enter an email address that is already in use.
New Email Address
If you have not verified your email address, type the address and click Update Email.
A message is sent to your email inbox allowing you to verify your address. Until you verify your address, the message “Unverified” is displayed.
Click Remove Email to clear the email address and prevent verification. If necessary, click Re-send to resend the message.
Confirm Email Address
Retype the email address to confirm that you typed it as intended.
❏ Click Verify Email Address.
You will receive an email message at that address containing a verification link.
If you entered an email address when you registered for this parent portal account, you should have received an email message in your inbox with a code allowing you to verify your email address.
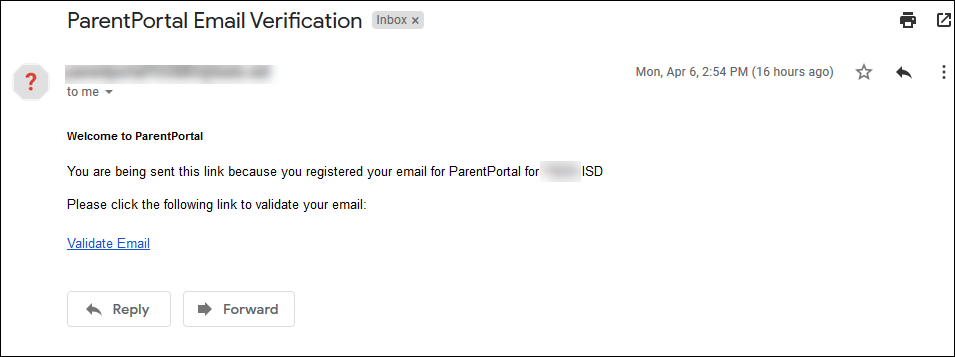
❏ Click Validate email.
A message is displayed indicating that your email was successfully verified.
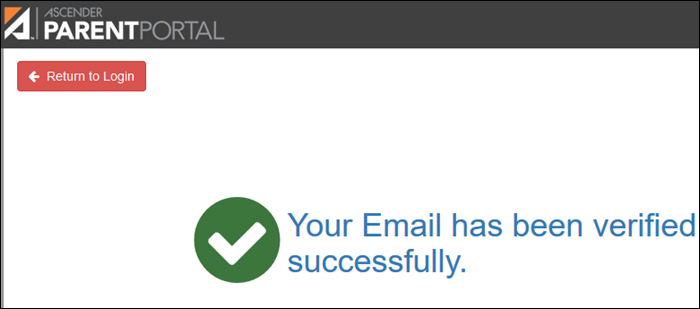
Once you have verified your email address, you can click Remove Email at any time to remove and/or change the email address registered, or to remove the email address.
If you click Remove Email, the current email address is removed.
The email address field is displayed allowing you to verify another email address.
If you remove or change your email address, your alert notification options will be reset. To reset your alerts, go to Alerts > Subscribe to Alerts and set the Alert Notification Type field according to your preferences. The option to receive alerts by email will not be available unless you have an email address successfully verified.
Mobile
Registering your mobile phone number enables you to receive alert notifications as text messages.
IMPORTANT: If you change cell phone carriers, you may stop receiving alert messages, and you may need to re-register the number.
Mobile Number
Type the cell phone number to be registered in the AAANNNNNNN format, where AAA is the area code, and NNNNNNN is the number. Do not use hyphens.
❏ Click Verify Mobile.
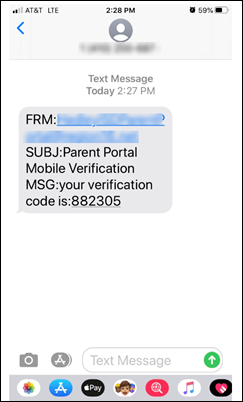
You will receive a text message at the number entered which will contain a verification code.
The Verification Code field will appear.
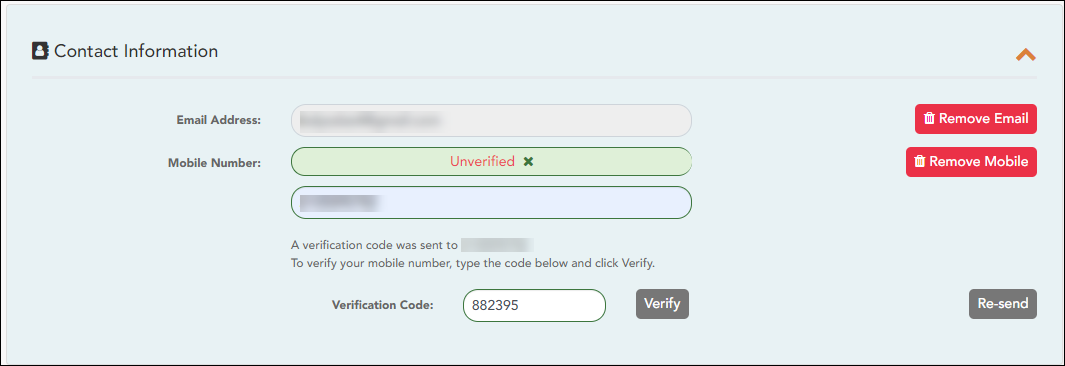
Verification Code
Type the verification code that was sent in the text message.
❏ Click Verify.
If the code was entered accurately, a message is displayed indicating that you have successfully signed up to receive text messages.
If the verification code is unsuccessful, click Re-send to send a new code.
Change or remove your mobile number
Once you have verified your mobile number, you can click Remove Mobile at any time to remove and/or change the cell phone number registered.
If you click Remove Mobile, the current number is removed.
The mobile number fields are displayed allowing you to verify another number.
Security Information
Update your ASCENDER ParentPortal account password and hint questions.
Password
You can update your ParentPortal account password at any time.

❏ Click Update Password.
A pop-up window opens:
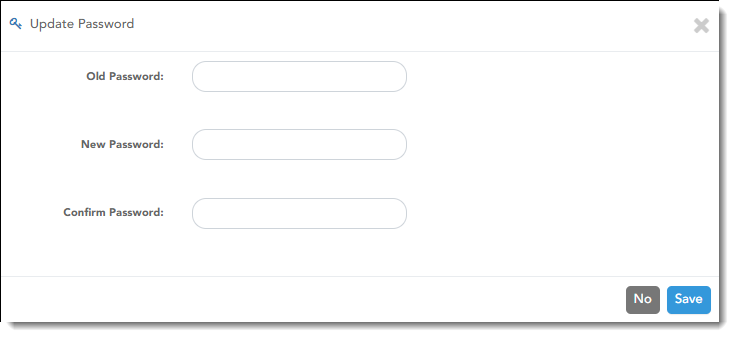
Old Password
Type your current password in order to verify your access.
New Password
Type a password that you will use when you log on to txConnect.
• The password must be 8 to 25 alphanumeric characters.
• Use a combination of the following: uppercase, lowercase, numeric, and/or punctuation (e.g., aBcd1234).
• Your password is case sensitive (i.e., you must always type it exactly as it is entered here, including uppercase and lowercase letters).
Confirm Password
Retype your password exactly as it was typed above. This step confirms that you typed your password as you intended.
❏ Click Save.
The password is changed.
Security Questions
Security questions and answers are used to verify your identity if you have forgotten your password. You can change the question, the answer, or both at any time.

❏ Click Update Security Question.
A pop-up window opens.
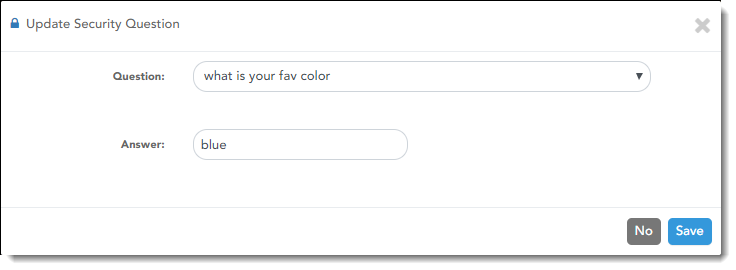
Question
Select a question to which you will provide an answer. This question will be asked in the event that you lose your password.
Answer
Type the answer to the question.
You will be required to answer the question correctly in order to recover your password. Be sure to select a question for which you will easily remember your answer.
IMPORTANT: The answer is case-sensitive (i.e., you must always type it exactly as it is entered here, including uppercase and lowercase letters).